Start hereYour first sealed sequence, in about five minutes
Randomista is organised around one idea: each stage produces an artifact, and the artifact locks what came before it. Work left to right and the app stays out of your way.
- Tap + in the top bar → New Project. A project is just a folder — a grant, a paper, a course.
- Tap + → New Study, give it a title, and open it.
- Open Design and tap Add Arm twice. The first arm is named Control for you.
- Open Power, keep the defaults, and tap Adopt as target N.
- Open Randomise → New Sequence → Generate & Seal.
You now have a sealed, reproducible allocation sequence with an audit record you could paste into a paper. Everything below is detail.
01Projects and studies
A project groups studies; a study is one trial. On iPad both live in the sidebar, grouped by project and collapsible. On iPhone they're in the Studies tab.
Opening a study shows the pipeline stepper, the five stage cards, and a Tasks card below them. Each card summarises its own state — "Needs at least 2 arms", "No sequence yet", "64 per arm" — so the overview tells you what to do next without opening anything.
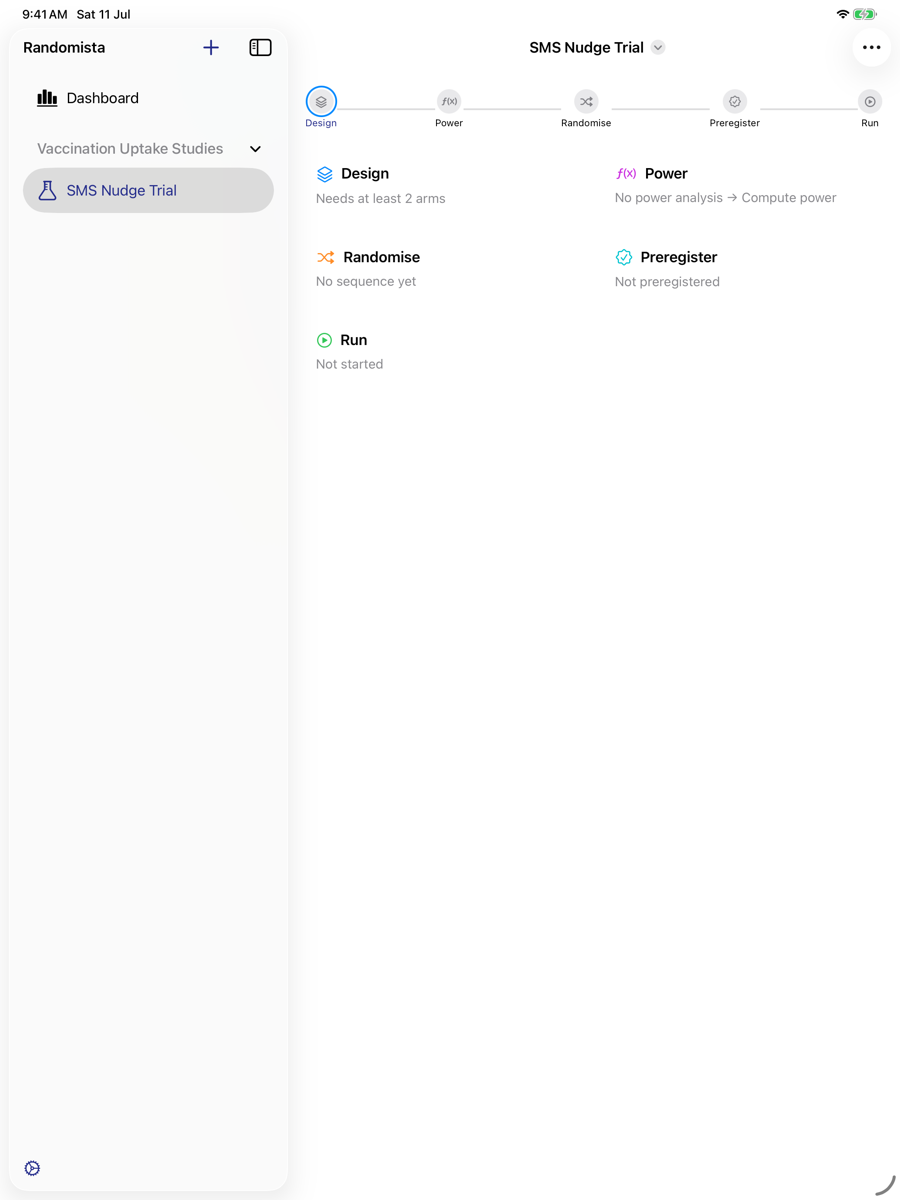
The ⋯ menu in the toolbar holds Archive, Move to another project, Duplicate as new version, and Delete.
02Design — your trial's anatomy
Everything downstream reads from this screen, so it's worth being precise once.
Arms
Add Arm creates a condition. Exactly one arm is the control — tap the Control badge on another arm to move it. Weight sets the allocation ratio: leaving both at 1 gives 1:1; setting the treatment to 2 gives 1:2. The footer shows the resulting ratio as you type, e.g. Control:SMS Nudge = 1:1.
Stratification
Add Factor adds a variable to balance within — site, gender, baseline severity. Type its levels separated by commas (north, south, central). The app shows how many strata the combination produces; Site × Gender with two levels each is four strata. Randomisation then runs separately inside each one.
Outcomes
Add your primary outcome first — it's marked PRIMARY automatically — then any secondary ones. Each outcome records its measure, timepoint and expected direction, and all of it flows into the preregistration later.
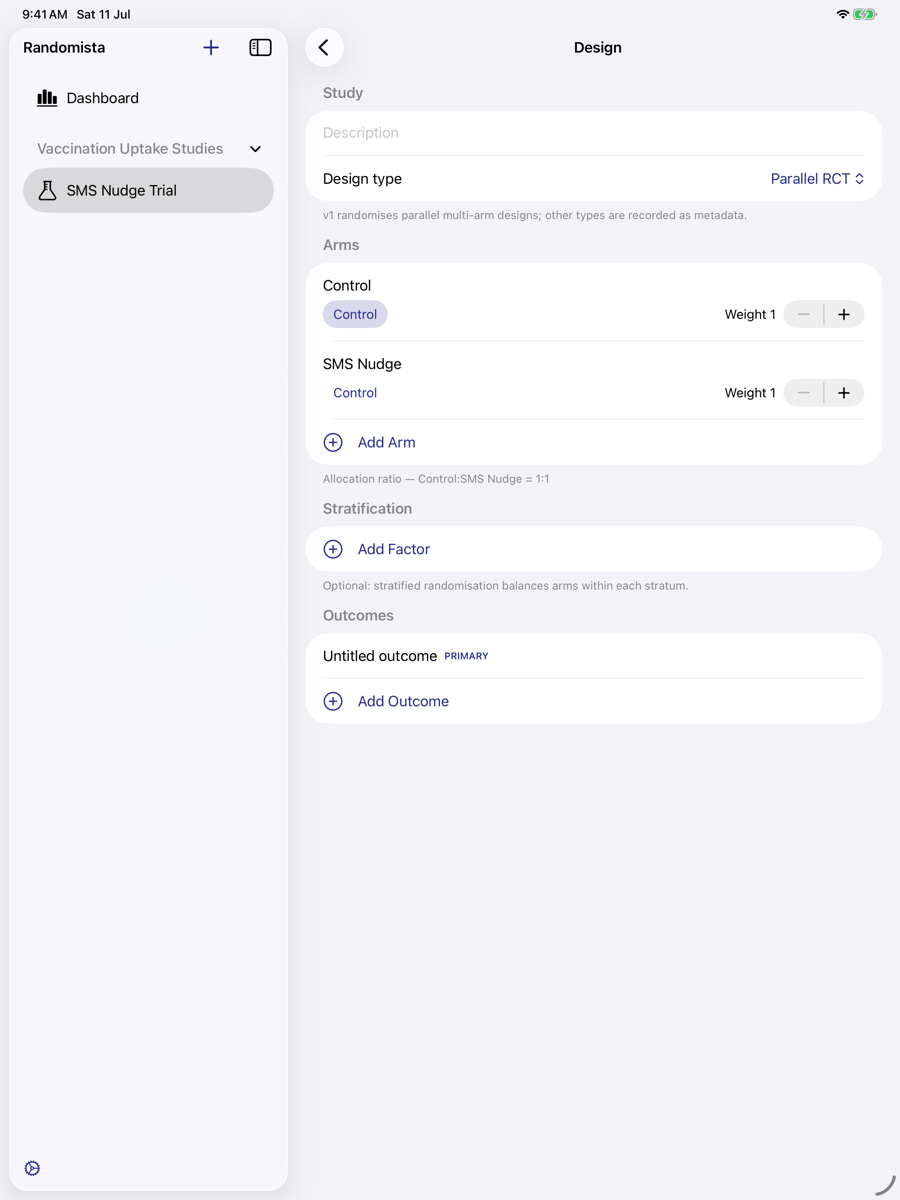
You don't need the design finished before exploring Power — but you do need it finished before you seal a sequence, because sealing locks it.
03Power — how many participants?
Pick the test that matches your primary outcome:
- t-test — comparing two averages (a score, a time, a count of days)
- Proportions — comparing two percentages (clicked / didn't, attended / didn't)
- ANOVA — comparing three or more group averages at once
Set the effect size you want to be able to detect. If you have no prior estimate, the Small / Medium / Large buttons fill in Cohen's conventions as a starting point. Under Parameters you can adjust alpha (default .05), target power (default .80), one- or two-sided, the allocation ratio, and expected attrition, which inflates the recruitment target to cover dropout.
The Result block gives sample size per arm, total N and achieved power, with a curve showing how power grows with N. Every number is checked against R's pwr package, so it will match what your reviewers compute.
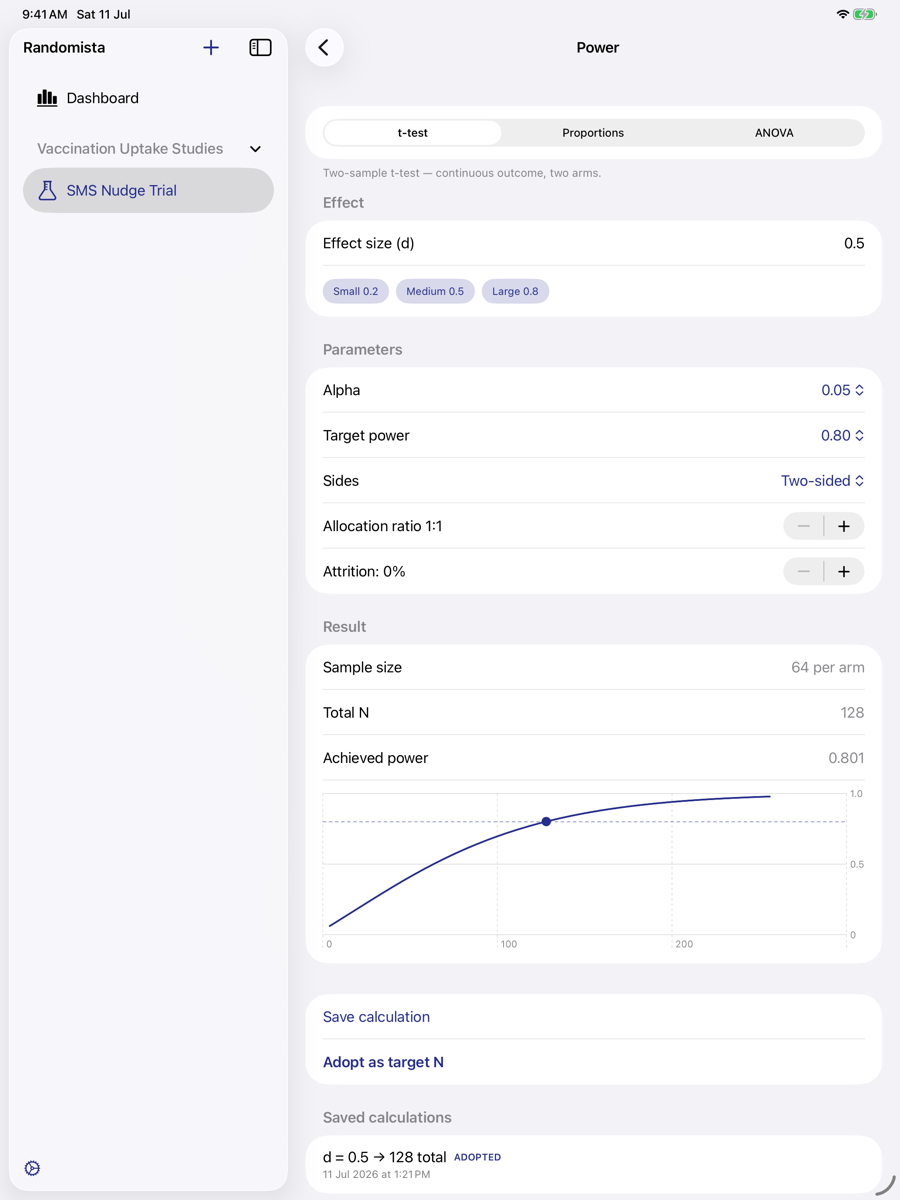
Save calculation keeps a result in the study's history so you can compare scenarios. Adopt as target N makes one of them the study's official target — it then appears in the randomiser and in the preregistration automatically.
04Randomise — sealed the moment it exists
Tap New Sequence and choose a method:
| Method | Use when |
|---|---|
| Simple | Each allocation is independent. Easiest to explain; group sizes can drift apart in small trials. |
| Permuted block | The default for most trials. Guarantees balance after every block of participants. |
| Stratified | You added stratification factors and want balance inside each stratum. |
Under Parameters, the seed is the number the whole sequence is generated from. Keep the suggested one or type your own — anyone with the seed and these settings can reproduce your sequence exactly. Then Review and Generate & Seal.
Creating a sequence seals it: its settings freeze, and a SHA-256 fingerprint is stored and re-checked every time you open it. There is no edit button, by design. If the plan changes, you make a new sequence or duplicate the study as a new version — the honest amendments, both visible in the record.
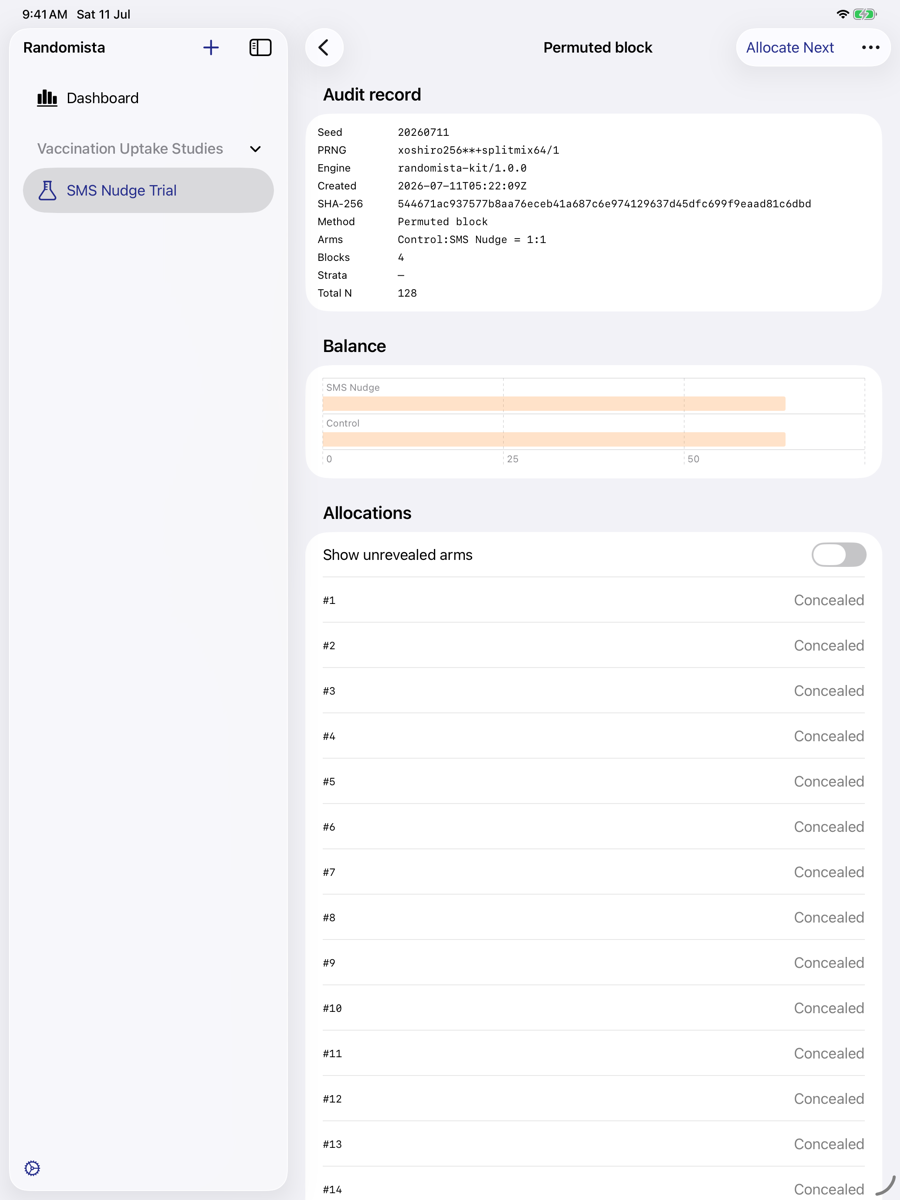
The Audit record holds the seed, PRNG, engine version, creation time, hash, method, arms, block size, strata and total N. It's laid out to be screenshotted straight into an appendix or supplement.
05Allocate — concealed until you reveal
In the allocation table, unrevealed rows read Concealed. That's allocation concealment: you can't see what's coming, so knowing the next assignment can't influence who you enrol. The Show unrevealed arms toggle exists for after the trial, when concealment no longer matters.
When you enrol someone, tap Allocate Next. You get one large button and, optionally, a participant label — use a pseudonymous code such as P-014 rather than a name. Tap Reveal next and the arm appears in large type, readable one-handed at a clinic door or in the field.
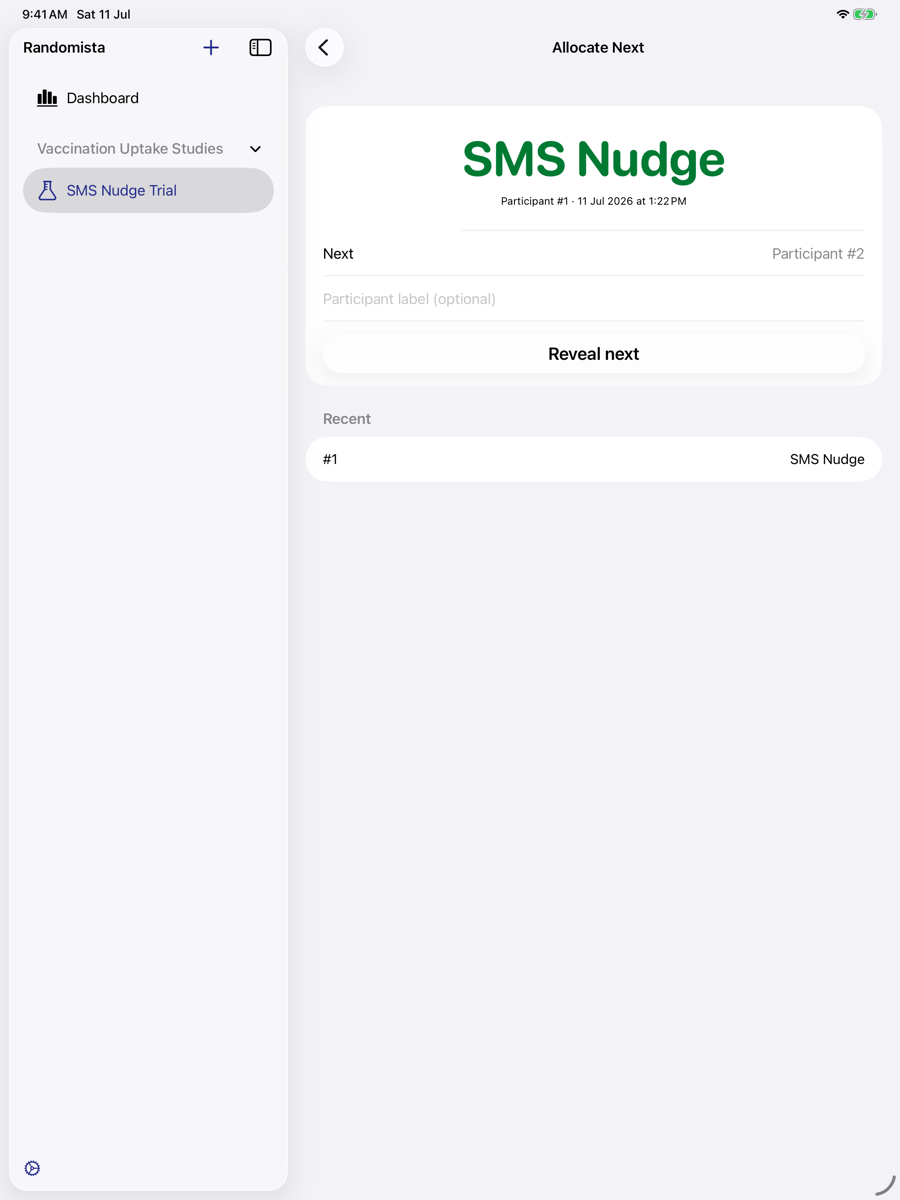
Time of reveal and participant label are recorded permanently and cannot be edited afterwards. That's what makes the allocation record evidence rather than a note.
If a stored sequence ever stops matching its sealed fingerprint, the app says so loudly and preserves the evidence instead of quietly carrying on.
06Preregister — the form fills itself
Preregistration means committing to your plan publicly before you collect data. Randomista drafts the standard nine AsPredicted questions from what you've already built.
Tap Fill all from design and the app proposes answers: your outcomes and how they're measured, your conditions and allocation ratio, the sample-size reasoning from the adopted power analysis, and a randomisation audit line carrying the method, seed, engine and hash. You then edit anything you like — it never overwrites your text silently.
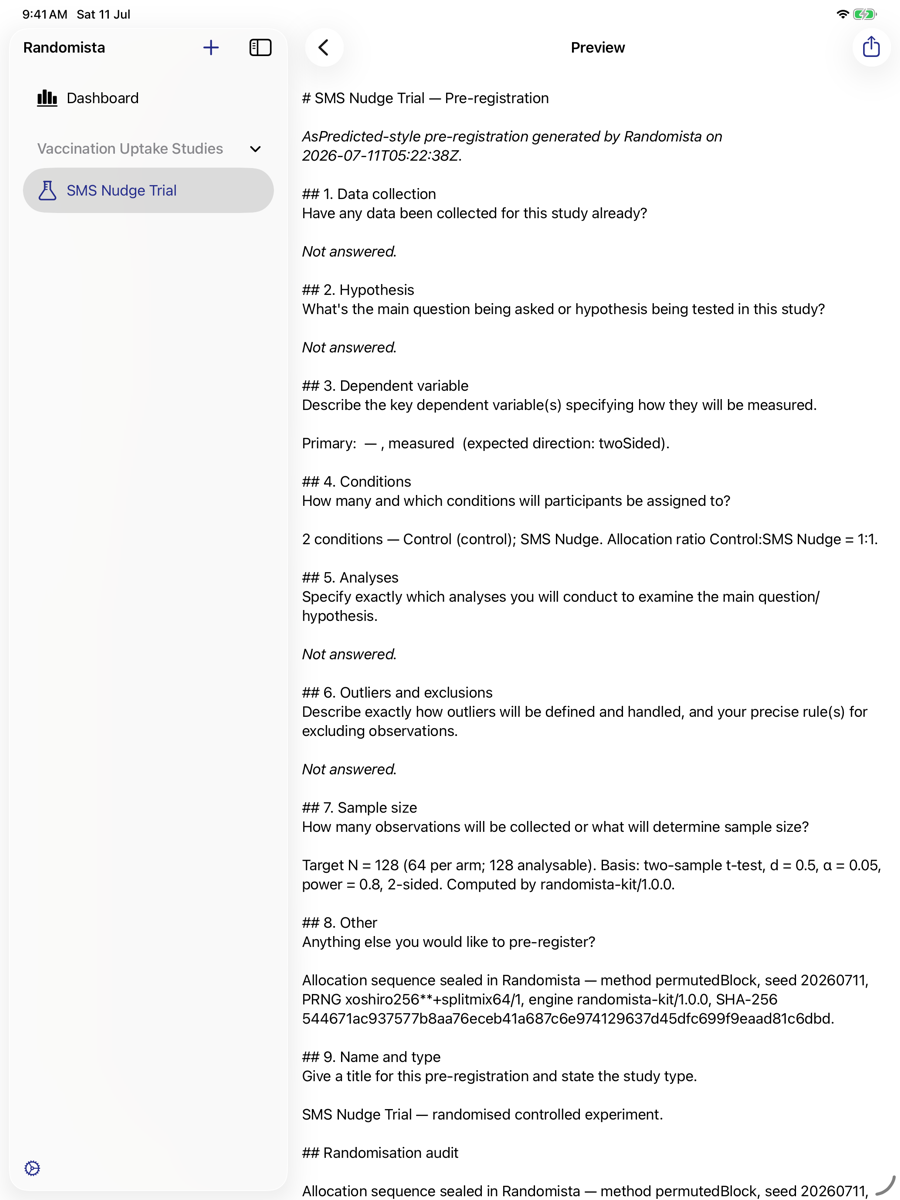
Preview renders the finished document; from there you can export Markdown or a print-styled PDF to upload to the Open Science Framework or attach to an ethics application.
Marking the study registered locks the preregistration and your outcome definitions permanently. Do it when you've actually filed, not before.
07Tasks and the dashboard
The Tasks card on the study overview opens a per-study checklist. On a new study, Insert starter checklist adds the five steps most trials need:
- Ethics approval — IRB or committee approval received and filed
- Pilot the instrument — dry-run the survey or measure end to end
- Freeze the preregistration — register the prereg and lock the design
- Launch data collection — open recruitment, start allocating
- Attrition check — compare real dropout against your power assumption
All five are fully editable, and you can add your own at any time. Give a task a due date and switch on its reminder to get a notification; the hour reminders fire is set in Settings.
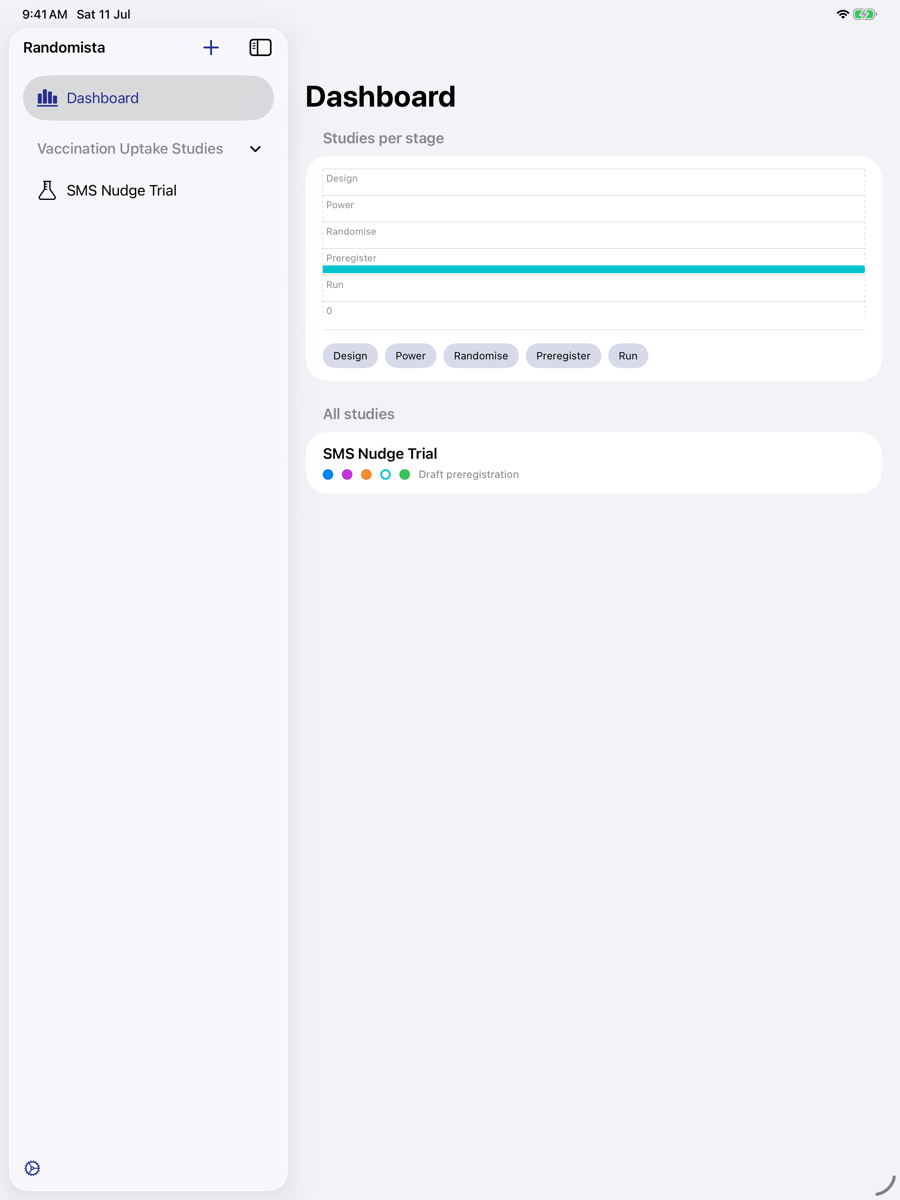
The Dashboard shows every active study by stage, what each one's next action is, and everything due in the coming week — the view worth opening on a Monday.
ConceptsUnderstanding the locks
This is the part of Randomista most worth understanding, because it's what makes a trial defensible.
| When this exists… | …this becomes read-only |
|---|---|
| A sealed sequence | Arms, weights and stratification factors |
| A registered preregistration | Outcome definitions and the prereg answers |
The locks aren't a setting you can switch off, and there's no "unlock" button hidden anywhere. They're derived from whether the artifact exists, which means they can't drift out of sync with reality and can't be forgotten. You cannot quietly edit a trial that's already running.
So how do I change something?
The same way you would in a lab notebook — by superseding, not overwriting. Use Duplicate as new version from the study's ⋯ menu. It copies the design, outcomes and draft answers into a fresh, unlocked study, while the sealed sequences, saved power analyses and registration stay with the original. Locked studies are never unlocked, only superseded — so the history of what you actually did stays intact.
ReferenceGetting data out
- Allocations, full CSV — every position with its arm, block, stratum, reveal time and participant label. For analysis, after the trial.
- Allocations, concealed CSV — the same table with unrevealed arms withheld. Safe to share with a colleague mid-trial.
- Preregistration, Markdown — for OSF, AsPredicted, or a repository.
- Preregistration, PDF — print-styled, for ethics applications and supplements.
Everything leaves through the standard iOS share sheet, so you can AirDrop it, mail it, or drop it into Files, Dropbox or a cloud folder.
ReferenceKeyboard shortcuts
With a hardware keyboard attached to an iPad:
| ⌘N | New study |
| ⌘F | Search studies |
| ⌘, | Settings |
| ⌘1 … ⌘5 | Jump to Design, Power, Randomise, Preregister, Tasks |
| ⌘⇧N | New sequence (on the Randomise screen) |
QuestionsCommon questions
Where is my data stored?
On your device, in the app's private storage, and nowhere else. Randomista makes no network calls at all — no account, no analytics, no servers. Your data is included in your normal encrypted device backup, and is deleted if you delete the app.
Can I use it on my iPad and iPhone?
The app runs on both, but studies do not currently sync between devices — each device holds its own. Keep one device as the system of record for a given trial, and use the CSV and PDF exports to move anything you need.
Can I edit a sequence after sealing it?
No, and that's deliberate — an editable allocation sequence isn't evidence of anything. Create a new sequence, or duplicate the study as a new version.
I made a mistake in the design after sealing. What now?
Duplicate the study as a new version, fix the design there, and seal a fresh sequence. The original stays as the record of what you originally planned, which is exactly what a reviewer or auditor would want to see.
What if I reveal an allocation by accident?
The reveal stands — it can't be un-stamped. Record what happened in a task or in your protocol deviation log and continue; that's how a real trial handles it, and the honest record is more valuable than a tidy one.
Is a participant's name safe to type in?
It stays on your device, but use a pseudonymous code such as P-014 anyway. Your ethics approval almost certainly expects identifiers to be kept separately from allocation data.
Something isn't working, or I need a feature.
Write to randomistaApp@pm.me. Tell me the device and what you were doing — it goes straight to the developer.